Pages

Friday, 30 December 2016

How to print digital stamps from windows photo gallery without resizing

Windows photo galley will give you the option to print more than one image to a page without the need to resize the images in a program beforehand.

Go to start and type in the search bar >> windows live photo gallery or it may already be in the menu, click to open the program.


To the left side is the picture folder menu, click on the folder that contains the images you'd like to print. Click on the check box next to the two images to select. A blue highlight box should now show on both images.


Go to the tab menu and click File >> print >> print 


Select on the print pop up box  
the correct printer from the drop down menu,
Paper size A4,
Copies of each picture: 1
Uncheck fit picture to frame
Select 13 x 18 cms (2)
click on print


That's all there is to it!

Please post your questions and comments or alternatively
 join us at Art by Barb Facebook Group to post a post!! (ahaha!)


Thursday, 29 December 2016

How to merge and save digital stamps in MS Word

In the tool tab, find and click on insert >> picture.

To release the image so you can move it, right click on the image and select wrap text >> square


To resize the image use the corner point to maintain the image proportion and not the centre one


Repeat the above steps: import another image (png) to overlay on the first image and resize


To save the image click select >> select all and got to the left hand side of the tab and click copy


Open a new file' Go to file >> new >> create


Go to paste and select paste special


Right click on the new document and select Picture (enhanced metafile) click OK 


Name the file >> select jpeg and click save


All done. Now you're ready to print.


Please join us at ArtbyBarb Facebook group to post a suggestion for a backdrop and props or leave a comment on the blog. 


Monday, 31 October 2016

Free Ducklins image at ArtbyBarb Colouring Challenge

We are very excited at ArtbyBarb facebook group  to launch our very first colouring challenge.

We provide the below free line art for you to add a splash of colour and your own brand of creativity.

I will enter the line art into the digi Artists Challenge as a state of serenity!

I used promarkers as a base and added detail with Spectrum Noir coloured pencil.

The end date is the 11/11/2016 and the prize will be 3 images of the winners choice from our Esty shop  and top 3 will receive one image of their choice, which will be announced on the 12/11/2016
Please join the group to read the current pinned post and to request the free image to enter the challenge.


Thank you for stopping by,
Barbara 


Saturday, 22 October 2016

Cute Christmas digital stamps

I have really enjoyed drawing and colouring these cute characters. I have designed them to be easy to colour, not much skin and no hair to daunt you, Also, they're appropriate for either a boy or girl card.
Combine my cute characters with your colouring and make all your crafty Christmas makes standout on the mantelpiece this year!

Visit Etsy shop and artbybarb group to browse more Christmas line art.


Thank you for stopping by,
Barbara

Tuesday, 18 October 2016

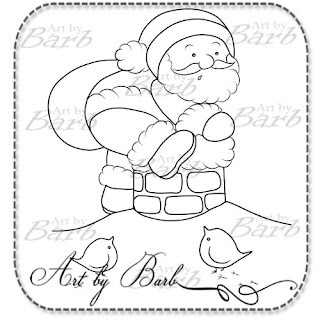
Christmas Digital stamps and free sentiment

I've being busy drawing new images for the festive period. It's my Birthday soon, so handed in my colouring wishlist to my sons and keeping my fingers crossed that I receive lots of colouring goodies. So, I'm currently waiting patiently to colour all my new images, which can be found on my Etsy shop and FB group.


Thanks for stopping by,
Barbara


Sunday, 2 October 2016

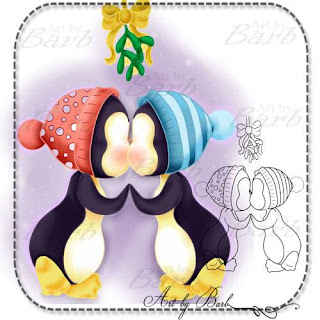
Winter kisses digital stamp & free sentiment

I hope you will agree that these adorable little snowpeeps will make a really cute card to send to someone special in your life this Christmas.


Digital stamp is available at my Facebook group and over at Etsy

Also included is a free sentiment to accompany this image


Thank you for stopping by.
Happy Crafting,
Barbara

Friday, 30 September 2016

Kissin Bears Christmas digital stamp and free sentiment

Another oldie but goodie digital stamp for all your Christmas crafty makes. I think it will make a cute card to send to the love in your life or perhaps as a gentle nudge to someone you have your eye on, maybe at work eh?! (Let me know if it actually works)


 Pop over to my Etsy store or facebook group to purchase this image and make a start on your Christmas cards today!

I've also included a free sentiment to accompany this image.


Thank you for popping by and if you have a suggestion for a Christmas image please pop your idea in a comment.
Happy crafting,
Barbara

Thursday, 29 September 2016

Holy Night Christmas digital stamp and free sentiment

The nights are drawing in and Christmas will soon be upon us.. I love this time of year and I really enjoy thinking up ideas for Christmas digital stamps. This image is an oldie. One that I drew many years ago, I think he will stand the test of time on your Christmas crafty makes this year. You can find him at my store and also at my facebook group


I have also included a free sentiment to accompany this image


Thanks for stopping by.
Happy crafting,
Barbara


Friday, 23 September 2016

Tips to help create a popular Facebook Group

You can have a group total of thousands and yet it's as quiet as a mouse and the opposite is also true, have a low member count, but have a really good interactive vibe going on in a group

I think most group owners have experienced the dreaded tumble weed moment after what was in their opinion a great post! It happens...but as the owner it is up to you to get the conversation started and to keep it rolling. Here are a few tips to help you to do just that...

Facebook games:
  • Don't discredit the forum game (I did!) now I see the hidden value in them. 
  • They're a great conversation starter.
  • A fun way for members to interact with not only you but also with each other. A chance to get to know one another, which is how a community is formed and grows.
  • Games increase your group's visibility. Every time a member participates in a post, FB uses that information to make that content (your group) more prominent in their news feed, therefore creating more group engagement.
Keep your post short and to the point. Don't post a thousand page essay. People automatically dismiss it and scroll on past your post.

I understand the need for rules, but again use bullet points and not a mass of text. People do not have the time to sit and read paragraph after paragraph of dos and donts, before even looking at the group content. After all isn't that why they joined and not to be met with a rule book. 

I connect real life to the virtual, walk in a shop and immediately be handed a dos and dont list, thou shalt not steal, thou will conduct yourself appropriately whilst on these premises and so on. You'd go to the next shop, muttering under your breathe  "I only wanted to look at the dress in the window." You'd feel unwanted and not welcomed.

People join for a specific reason, allow them to browse the group, settle in and make themselves at home. As in real life, we know how to conduct ourselves in public and people know how to conduct themselves online, If they're unsure, they will ask. This will be the time to direct them to your rule post.

Keep it Real...

One of my members has a very dry wit, at first her comments seemed odd. Initially, I didn't respond to her first comment. I left it a while, went back later and got the humour contained in the comment. I responded in kind. Recently, she shared a post that she was experiencing grief of a loved one and knew that when she first joined my group she'd found a friend, because I'd responded to her with humour. I felt touched by her post and I look forward to receiving her comments very much.

Members are real people, therefore be real and converse with your members as if you were having a face to face conversation. Respond to every comment and try to refrain from posting a sticker. Put some thought into your response as people like to receive one. Make it worth reading. People log on to facebook with the mindset to participate in a community website, therefore use the opportunity to create one.

Initially, I created my group to promote and sell my artwork. I never anticipated that I would actually form friendships with my members and that I'd come to care about them. If I've not seen one of them post online, then I find myself wondering if they're OK. Now, my focus is on building a community, because a group is not just about me and my wares, it about each and everyone of us, a place to share and inspire each other.

I really hope you find some of this information helpful. If I've missed out something please feel free to share your experience in a comment, as a group owner or member.

Barbara, proud group owner of Art by Barb 

Thursday, 15 September 2016

Bearing Gifts Digital Stamp

As you can see, I can't stop colouring these two little cute Christmas bears! I coloured the top image with promarkers and Spectrum noir colour pencils.

The second image was digitally painted in Paint Tool SAI


If you'd like to colour these cute bears, you can take advantage of our 10% discount and use the coupon code "artbybarb" at our Etsy store 


And it doesn't stop there, we're having fun over at our facebook group telling a story about these two adorable bears. It's a very funny post and you're welcome to come add your two penn'orth. Who knows we may get our story published!
Not sure it will be a children's book though ...hahaha!


Thank you for popping by,
Barbara x

Also I have entered the colouring challenge over at The Pencil Case

Monday, 12 September 2016

How to build a top brand pen collection on the cheap

Colouring materials can prove to be costly. Perhaps you begin to collect pens at the pound shop, post your finish creation online, scroll through the wall for inspiration and blow me you see someone else's work, it's amazing, so rich and vibrant, hurriedly you type, "What did you use?"... await anxiously for their reply ....promarkers, copics, a top brand pen! Don't panic, no need to remortgage the house just yet....

Colouring can be a cheap or an expensive hobby... there is nothing wrong with the cheaper materials but once I had used a higher end marker there was no going back.

I started to colour about 10 years ago and at that time craft colouring was still fairly simple compared to today's standard of colourist. I guess you could say it was still in it's infancy stage, therefore my very first googled tutorial was a tilda stamp and the lady used a three colour combination for each of the skin, hair and the dress. So, they were my first promarker purchase, making it 9 pens in total, which didn't break the bank and meant I could complete the character.

If you want to colour a character then I recommend you buy three pens at a time, a light, medium and dark of the same tone. To begin with maybe opt for 9 pens if you can afford it and to avoid the frustration of not being able to complete the image.

If you're colouring adult patterns, two pens of the same tone is sufficient.

Google promarker/copic colour combinations.

Google single stock markers for your country.

I'm in the UK, so use this site Cult Pens. They stock a wide range of art material, Copics and colour pencils can be purchased as a single. They have quite a few offers on at the point of writing this blog post.

I bought 3 pens per week and I soon built up my promarker collection. I still use them today,

Also, use the higher end pens with your inexpensive ones.

I have never used an expensive paper. I opt for a super smooth. At the moment I use this one from Ryman and the below image is the result.


However, I do think colouring paper is personal preference. I have never used the expensive ones, therefore I can't really state for sure if it's worth purchasing it or not. Anyway *note to self* this blog post is about colouring on the cheap, so folks I recommend you go for the cheaper option!

Check out my digital stamps and come join in the fun at my group.

Barbara :)


Sunday, 11 September 2016

How to avoid colouring copyright conflict online

With the online colouring craze comes a lot of confusion over artist copyright. I see both points of view as an artist and at one point an inexperienced colourist who just thought they were colouring and not breaking the law.

I believe people are inherently good law abiding citizens and 69 year old Elsie, doesn't sit of an evening with a spot of colouring with the sole intent to break the law. In her mind she is simply colouring.

I believe a better way to highlight copyright is through education and not by pointing a finger of blame at an individual.

I have complied a few tips along with an explanation to help the inexperienced colourist to avoid online conflict
  • Sharing an image is considered to be stealing. 
At work, one of my customers is a retired inland revenue employee, so I asked him for some tax advice. He politely declined as it would be taking money from someone else. I was pleased to learn this consideration occurred in other occupations.
File sharing is the same, you're taking away a potential sale from the artist.
  • Be courteous and download an image from the source and not from google or pinterest. 
Remember this is someone's labour of love, just like your colouring is your labour of love.  By all means use google and pinterest but keep on clicking until you trace back to the original post. Even if you hit a cached image. Right click on the image, select "search google for image "and continue with the search.
  •  Add who the original artist is of the line art and if allowed add a link back to the source. 
It's unacceptable to post something along the line of, *Found on pinterest. Artist unknown.* People are offended by this because you may as well write, I can't be bothered to do the homework. Very rare for an artist to be unknown,
Artist have many admirers of their work who will be offended on their behalf if you do not credit correctly and will report back to the artist. You may find yourself served with a cease and desist notification, I don't wish to instil fear here, but I've seen this happen online. Always cover yourself.
  • Add a watermark to a coloured image before posting.
If you're unsure how to add a watermark, then add a pen, pencil or a similar obstacle in the corner of the image. 
Even if your cat flicks it's tail in the image, great you have created a problem for someone who may have in mind devious intent to use your image.

And to finish off I have found some nice colouring pages

You may think you're just colouring but in this computer age you're entering a colouring copyright minefield! Stay safe colouring cadet!

Check out my digital stamps and come join in the fun at my group.

Barbara :)


Friday, 2 September 2016

Free Fairy Digital Stamp


Coloured with promarkers
Hair: Lipstick red, Berry red, Ruby & Burgundy
skin: blush, oatmeal, apricot, coral
Dress & eyes: Duckegg blue, Marine, Turquoise
Wings: baby pink, Antique pink
Shoes & top: ice grey 1,3 & 5

Fairy image is free and available to colour @ ArtbyBarb

Thank you for stopping by :)

Monday, 29 August 2016

Ducklins digital stamp

Materials:
Ryman Paper
Image is available as a digital stamp @ Art by Barb
Spectrum Noir colour pencils.
Faber Castrell colour pencils.
Copics for the hair.
A promarker for the sun.
Whilte gel pen to add highlights.


I haven't compiled a list of colour combinations because I like to encourage you to experiment with what you already have and not get too hung up on having the exact colour match and run out to buy them. Being there and done that! If you have a different brand, it's ok to use them. I think most people can guess the colours I have used from the picture, blues for the water, greens for the greenery and so on.  I pick out any green that comes to hand first, and it doesn't matter which shade with pencils as we are going to do a final blend and will merge together all the colours.

Tip: Pencils are less likely to break if you change hands and turn the sharpener and not the pencil. It works!

Happy colouring,
Barbara

Friday, 26 August 2016

Festive Greet coloured


Materials:
Spectrum Noir Pencils
Image available as a digital stamp @ Art by Barb
Ryman paper

I used SN pencils (no markers) and not too much blending for the foreground. I wanted to create an evening snowy sky and a soft look for the foreground. My thinking was that I could add more shadow to the snow if I was to create a dark sky and the snow falling would show better.
Although, the darker the sky got, the more I worried for the child...sure that child should be tucked up in bed at that time of night!!!

The sky was easy to do, I just scribbled across the page with pinks, purples and light blues until it blended itself. Used a really dark blue and black to add depth and interest. I was going to do the falling snow with white acrylic paint, but my daughter had used it and put it some place other than where I usually keep it (kids for you!) she was out and about, so had to use a gel pen, which worked!

I used a light blue and lilac for the ground snow, never used a lilac before to add shade but it worked really well.

The rest is self explanatory I think, the usual skin tones, browns for the fence and tree. Lilac and greys for the hat, jumper and pet. Pale yellows and a touch of light brown for the moon.

And that's all she wrote.

Image is available as a digital stamp @ Art by Barb and we also have a few free image that you're welcome to download and colour.

Thank you,
Barbara


Tuesday, 23 August 2016

New digi Release

I have released two new digital stamps, which are only available over at my FB group, Art by Barb. The group is running a colouring challenge at the moment and I am so impressed by the high level of creativity demonstrated by my members in their card making, So, I was inspired to create full scene digital stamps to go hand in hand with your advanced creativity and colouring.


We also have free images and sentiments over at Art by Barb

Come and join in our friendly community.
Thank you,
Barbara


Friday, 19 August 2016

How to become a confident hair colourist in just 10 years!

The most common question that I'm asked on social media is " how do you colour hair like that?" I'm not going to lie, hair is hard to colour, It takes practise to get it to look somewhat right. So, I thought I'd share some tips about how I learned myself to colour hair in 10 years, (you read that right, it didn't happen over night)


The first image I coloured was a Tilda stamp, the finished colouring was flat and lifeless. I was so disappointed with myself, but posted the pic online anyway, along with a negative status. A lady answered with encouragement to keep going (at this point I was ready to throw in the towel) for some reason I decided to carry on.


I was inspired to learn how to colour by other online colourists that were further a long the line of their colouring experience. I wanted to be as good as them and be able to add depth of colour in order to bring an image to life. So when you read or are told not to compare, well my advice is do compare and use the comparison to be inspired by those colourist and remember they are only further along the road than you, it's up to you to catch up with practise and the desire to become a better colourist.

Don't get hung up on techniques. Colourist develop their style over many, many years. In my experience it is so difficult as a beginner to master their technique straightaway, All I seemed to do was set myself up for a fall, which filled me with too much frustration. Eventually I came to accept that I was at the early stage and needed to give myself the time to learn and develop my own style.

Tips:
Watch youtube vids, especially colouring hair with coloured pencils. In my opinion these ones will help you to achieve a better understanding of the flow of hair and how to define hair.

To help define strands and sections of hair use a coloured pencil after using markers. Markers and pencils work so well together and you'll be happier with the end result.

Practise is important to build up muscle memory, the more practise you do, the more the mind remembers the action and if you keep practising, one day you'll have a Eureka moment and think "By jove, I think I've got it!"

More importantly enjoy the process. I learned to relax about it. Keep a folder of all your coloured images. Use the images to chart your journey. By looking back at how far you've come as a colourist, you'll be able to judge how far you can progress as a colourist. And those colourists that you compare yourself with today, you'll think I got there, I'm as good, if not better! You'll be searching for your next colourist candidate to be inspired by....Happy colouring

Join me at Art by Barb group, where you can collect this free image and sentiments. Ask me and my members for helpful advice and tips about colouring. Come Join in the fun!


Friday, 8 July 2016

Scubbies digital stamp coloured with pencils

I thought to try my hand at watercolour painting, so ordered a pack of watercolour card. The watercolour painting was a fail, I now see many hours ahead of watching youtube vids to learn how to!

however, I did find that the watercolour card took the colour pencils beautifully! and I remembered to jot down the colours that I used. (find list below)


Hair : Faber-Castell  Ivory, Brown Ochre,Van-Dyck-Brown,Burnt Umber
Skin: FB Sanguine,Cinnamon,Dark Flesh
Skin: Spectrum Noirs 005, 006, 007, 089,008,009
T-shirt: FC Dark Flesh. SN 005, 009
Eyes, bath tub and bubbles: SN 067, 077, 001
Sponge and Soap: SN 020, 014, 001
Dog ears: FB Dark Flesh SN 005, 001


Visit Art by Barb for the lineart of this coloured image, to view more original lineart and the free fairy is still available.


Thank you for dropping by,
Barbara

Wednesday, 6 July 2016

Digital Stamps Sashay Away and Scrubbies

What a week? My laptop refused to switch on (it's still under warranty) it was really odd, one minute it was working, made a cuppa, came back and it was off! I lost all my images. I was beside myself! I know, I should've backed up! (lesson well and truly learned!) Fortunately my lovely daughter bought me a laptop because she knew I wouldn't be happy to wait for it to be fixed.

The first image is inspired by our family dog Ralph. We had him from the dog's home a year ago. The first few months he was a handful , but over the last 6 months he's calmed and I've grown to really love him. His coat is pure white and he looks such a handsome boy after a bath. So my daughter is always bathing him! The other day we ran out of dog shampoo and seriously, she was going to use ordinary soap to scrub our Ralphy, until I stopped her! Oh well, at least she continues to feed my imagination!


While I was unconnected I took the opportunity to experiment with drawing hair. I love colouring hair, which has really helped me to pay attention to the flow of my drawn lines in order to be a better guide for the colourist. 


Visit Art by Barb for more orginal art and freebies
Thank you for stopping by
Barbara


Thursday, 30 June 2016

Ahoy There! digital stamp new release plus a freebie

Ahoy there! I have a fair bit to share in blog land today! Firstly,  may I present my latest digital stamps Ahoy There! (includes a boy and girl version.)


Take care,
Barbara 


Tuesday, 28 June 2016

Boy and Girl Baker Digital Stamp and a Fairy freebie!

I've set myself a challenge to draw a boy version for every girl image that I produce. To be honest, it's not as frightening as I first feared! Really enjoying it.

I was chatting to a lady on FB, who shared a pic with me of her little grandson, baking. Too cute! and my inspiration for the baking images.

Visit Art By Barb group to download your copy of the fairy freebie


Thanks for stopping by,
Barbara


Monday, 20 June 2016

oh la la Digital Stamp

I had nothing in mind to draw when I picked up pencil and pad. Usually, I would consider this one to be a practise piece, file it in a folder, forget about it and then find it again and look at it with a less critical eye. I liked this one straightaway, a few tweaks made during the ink process, mainly to the hair, but overall I just like how this one turned out, because it should due to the subject matter be dramatic and yet it has a tranquil feel. I like a contradiction in art, (take an idea or features, which are opposed to one another, but somehow work together) Admittedly this one was accidental!


And here she is, inked and ready to colour!


Visit Art by Barb group to browse more original art.

Thank you,
Barbara.

Sunday, 19 June 2016

Moonlite Mermaid Digital Stamp


This image is coloured with promarkers and colour pencils, however I realised through the ink process that I wasn't happy with her tail, I imagined a slow and smooth fan motion of the tail gently swishing in and out of the water to capture her contentment and enjoyment of each moment immersed in the shimming moon light. I drew some clouds to add atmosphere plus a couple of dragonflies to add interest and to complete the image.


This is the finished lineart. It doesn't need to be coloured as a moonlite scene. You might see a bright sun shinny day! 


Visit Art by Barb group to view this image and browse more original art to colour.

Thank you,
Barbara

Friday, 17 June 2016

Spot of colouring using "Blowin" digital stamp


I find that my drawings contain a blend of my daughter as a child and as an adult. This is exactly how she'd be dressed to hang out the washing today, in an over sized T.shirt and draws on show and a little bit of creative licence from me, because I don't think we own a duck!
It's a dreary day here in the UK, so I coloured an appropriate image to suit the day. I used every colour medium that I own, promarkers, copics, coloured pencils and watercolours for the background.  Usually, I don't bother with a background, but a while ago I bought watercolour pens and I really need to find a way to use them as they sit unloved in my craft cupboard. Can't have that! I really like how the background finishes the pic. Definitely be doing more backgrounds! 

 Visit Art by Barb group if you like the image and fancy colouring it yourself.

Thank you for the visit,
Barbara